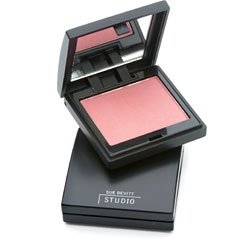
 Shown: Sue Devitt Blush @ Sephora.com
The first color product you should apply on your face before any other should be blush.
Why?
Because if it looks good without anything else on your face, you did it right.
It's time to give blush it's own special appearance.
Read on...
How to pick the right color.
Ideally we want that young, youthful flush of baby's pink cheeks. But a lot of blush colors out there just don't cut it. Stay away from blush that looks dull, gray, dark, heavy, even bluish in appearance. The trick is getting the right color for your skintone.
Try this test: Swipe blush on the inside of your wrist. If it looks good there, it'll work on your cheeks. Does it bring out the blue and dark veins in your wrist? It will most likely bring out the darkness and blue veins under your eyes.
Trick of the trade: Never apply a makeup color on your face, that has a color that you don't like in your skin. Or avoid colors with blue, gray, etc. Why? It just brings it out and makes it look worse. Case in point: Would you ever wear a red dress with sunburn? No. Why? It will make your sunburn look worse. Same in makeup. Have gray under eye circles? Stay away from that grayish mauve blush, or dull grayish pink lipstick. Won't work. Have a lot of red in your skin? Avoid red lipstick or blush. Why? It makes it look worse...
Think warm, sunny, watermelon, guava, or peachy pinks. Those colors will bring out the natural blush in your cheeks, and brighten and warm your skin. Looks great on anyone. Not sure? Try it on your wrist first. Wonder why Nar's Orgasm blush is so popular for lighter skins? It's the perfect peachy/pink shimmering blush for that skin tone. For darker skins, go with a warmer, darker version of the same... It's the blush that you'll find yourself throwing on when you're in a pinch. Why? It'll work everytime.
Nars "Orgasm" Blush @ Sephora.com
The right tools:
It's all in the brush.
Look for a rounded cut blush brush that exactly fits the size of your cheek when you smile. No smaller or bigger than your puffy cheek. That's the right size. Also, make sure that the bristles are not very long. The longer the bristles, the looser the brush and less control you'll have with the brush and your product.
Fool Proof Application.
When I worked in the salon, I can't tell you how many times I would get a client that would bring in a blush she had purchased, to tell me that the blush 'streaked'. Well, the product can't streak. It's in the application. How did this happen? Usually by brushing the blush brush, back and forth across the pan of color, and then applying it the same way onto the cheeks, in a back and forth motion. Off course the color will streak. Why? Because way too much color was applied in a 'streaking' motion. You've now got way too much blush on, that's probably in streaks across your cheeks. You know you are guilty of this if you have a 'hole' in the middle of your blush... ;)
So how do you apply correctly? Instead, take the ends of your blush brush and 'tap' onto the blush. Very lightly. You'll want to see very light traces of the color of blush on your brush. Not a lot, just a little bit. Now shake the brush a little. (Don't blow on the brush. A bad habit to get into because it's not sanitary..)
Then with your blush brush, smile and very lightly, "tap" the brush across your cheeks. Don't rub, don't run back and forth across your cheeks. Just tap. The taping creates an 'airbrushed' blended effect of your blush. It's applied and blended for you all at the same time. Now, wasn't that easy?
Now onto placement. Everyone knows the trick of smiling when you apply blush for the right area to 'blush' from. That's one quick way to apply blush. But the professional way to apply blush, is with guidelines. Yep, we've got quidelines, the trick to perfect application in makeup everytime. There are quidelines hair stylists use when they cut your hair, and there's also quidelines when you apply makeup. You just don't hear about them.
** Blush Guidelines**
For blush: you have 3 lines or quidelines.
Your 1st guideline is from the inside of your eye running straight down. This line determines where blush should end. Don't run color across your nose, unless you like the sunburnt look. Though Bronzer works great across the nose lightly. Why? Makes your nose look smaller, especially in photos.
The 2nd line is by the arch of the eyebrow. This is where blush ends. Go further and you'll end up on your forehead.
The 3rd line runs horizontally under your nose. This is the lowest that blush should go. Any lower and you'll get that windblown out in the cold look.
Within these lines, or guidelines is where you can apply blush. Outside the guidelines? it just looks off. Throws your bone structure out of balance. Not that you can't (I break this rule all the time when I do makeup on photo shoots for magazines and editorials, but that's another story..)
But for everyday, stay within the guidelines.
You'll notice trends will dictate where within these lines that blush is hip at the moment. Under the cheekbone? On the apples of the cheeks? Up onto the temple? Yep, blush will move around with the trends, but notice, it's always within these lines.
BLUSH FIX
****************************************__ Too dark or bright?
To tone down the color, take a powder brush or a clean blush brush, dusted with loose powder and apply over. To erase a bright blush, buff a dry makeup sponge with loose powder to erase even more.
Wrong color?
Erase with moisturizer applied on a dry makeup sponge and the moisturizer will pick up and erase the color completely. You may have to fix with a little foundation, but this works best when you completely want to erase the color without disturbing the rest of your makeup.
Special Beauty Newsletter Deals:
Free Shipping Over $75 @ Sephora.com