
Winter brings with it, cold, blistery days, and we mom's must see fit to shut the kids up inside, due to snotty noses and earaches. So, what's a kid to do on days like this? Take a look at these ideas for inspiration!
Snapshot Survey
Thanks for sharing your thoughts!
Please subscribe for your personalized newsletter:
Winter Snow Globe
Use recycled baby food jars to make these adorable snow globes!
You will need:
• Baby food jars (medium or large) or any other type of jar with a lid
• Florist clay (can be found at any craft supply store)
• Small figurine (see “Choosing your figurine” under “Helpful Hints”)
• White and/or silver glitter or fake snow
• Hot glue gun or aquarium sealing glue (hot glue is less expensive)
• Ribbon or felt (optional)
• Garland plastic greenery (see “Getting your greenery” under “Helpful hints”)
Directions:
Wash and Dry Your Jar Completely, Including the Lid
/filters:quality(70)/thumbs/24/a9u12mkz53lpzquz47lj4n_1080x1349.jpg)
Attach Figurine to inside of Jar Lid Using Florist Clay. if You Are Using a Small Object, It's a Good Idea to Build up the Clay so the Object Will Appear Taller. to Preview, Simply Place Empty Jar over the Top of Your Figurine to See if You Have the Height Where You Want It. Attach Any Optional Items with the Clay (greenery, Berries, Etc.). Important: Use Your Imagination, but Make Sure Whatever You Use is Waterproof and Won't Dissolve
/filters:quality(70)/thumbs/43/500rz9cl1fo66xr46oy7l_1200x1200.jpg)
Fill Jar with Water to within 1/2 Inch (1 Cm) of Top. Use Cold Water. Warm Water Tends to Cloud. Sprinkle ½ Teaspoon of Glitter, or “ Snow” into Water. This Measurement is Based on a Medium to Large Baby Food Jar. Adjust Glitter Amount According to Your Size Jar
/filters:quality(70)/thumbs/rr/sw/x4ml6ees5ab2b5fb805d1482613471_913x913.jpg)
Using Hot Glue Gun, Line inside of Lid with Glue. Insert Figurine in Water and Screw on Lid
/filters:quality(70)/thumbs/gi/d5/bggrtb2o5caa68e34613a385275712_1080x1080.jpg)
One who gains strength by overcoming obstacles possesses the only strength which can overcome adversity.
Dab Lid Dry if Any Water Dripped or Spilled. Apply a Layer of Hot Glue around the Rim of the Lid to Seal Shut
/filters:quality(70)/diy/thumbs/xk/zq/jsfngzjq_400x400.jpg)
Let Stand and Dry Overnight -- Lid Side up
/filters:quality(70)/parenting/thumbs/jh/cn/dexeympr_400x400.jpg)
Decorating the Lid Rim is Optional, and There Are Several Ways to do It. Attach Decorative Ribbon with Glue, Use Plastic Holly Berries for a Holiday Feel, or Use Colored Felt as We Have. This Can Be as Simple or as Elaborate as You like. Use White or Craft Glue to Run a Squiggly Line around the Felt then Sprinkle with Glitter and Let Dry. Glue on Buttons, Use Stickers, or Personalize Your Globe by Writing Your Name in Glue and Sprinkling with Glitter. You May Also Paint the Lid Rather than Use Ribbon or Other Embellishments. the Possibilities Are Endless so Have Fun!
/filters:quality(70)/thumbs/k2/vl/rx9azovz5b746f8d71d3a314214242_1077x1077.jpg)
Jingle Bracelets
These are perfect for your little girl to make for friends and family for Christmas gifts!
All they require is pipe cleaners, small craft bells and beads.
For a simple bracelet, thread beads and bells on bracelet and twist ends together. You can get more elaborate and fancy by twisting pipe cleaners together and getting the scalloped pipe cleaners as well.
/filters:quality(70)/thumbs/ti/b2/n0nh7zto5b74035c14d06480994725_1080x1080.jpg)
Paper Bag Reindeer
Here is a way to inspire some creativity and imagination! Design your reindeer puppets and have a puppet show!
You will need:
• Brown paper lunch bag
• Medium black pom-pom
• White craft glue
• Construction paper: black, white and tan/brown
• 4 jungle bells
• Scissors
• Red plastic milk jug lid
• Glue stick
• Gold paint pen
Directions:
/filters:quality(70)/thumbs/mw/vd/zumhkxz95b7393bc4fabb008733822_1080x1080.jpg)
Use White Glue to Attach the Black Pom-pom to the Flap of the Bag
/filters:quality(70)/thumbs/g9/y7/tis2yflf5b7250952b892476534359_1080x1080.jpg)
Cut out the Eyes. You Will Need Two Brown/tan Eyelids, Two White Eyes, and Two Black Pupils. Assemble the Eyes with a Glue Stick. Use the Glue Stick to Attach the Eyes to the Front of the Bag above the Pom-pom Nose
/filters:quality(70)/thumbs/eq/f2/q41y7ofs5b6c12934eef8611802491_720x720.jpg)
Cut a Strip of Black Paper with Width of the Paper Bag, about One Inch Wide. Cut a Small Piece of Black Paper for the Name Tag Hanger. Glue the Small Strip to the Center of the Larger Strip so That It is Hanging down
/filters:quality(70)/thumbs/zu/c2/rf93c5pd5b6a579066718081809408_1080x1080.jpg)
Use Gold Paint Pen to Write "Comet" on the Red Plastic Lid. Glue the Lid to the Bag, Overlapping the Small Black Strip (hanger)
/filters:quality(70)/thumbs/a2/ln/h417308n5b67596c315a5308774238_1064x1064.jpg)
Use a Generous Amount of White Craft Glue to Attach 4 Jingle Bells to the Black Strip (collar)
/filters:quality(70)/thumbs/xy/c6/si0vvfay5b66b0622ec11085134303_1080x1080.jpg)
Trace Child's Hands onto Brown/tan Paper and Cut out. Use Glue Stick to Attach the Hands to the Back of the Bag as the Antlers
/filters:quality(70)/thumbs/ks/or/gd21b1ee5b668f97e7daa846002389_1071x1071.jpg)
Pine Cone Snowman
This is super cute, and would make perfect gifts for aunts, grandmothers and teachers!
You will need:
• Pinecone
• White, light blue, and black craft paint
• 1 brown chenille stem
• 1" piece of orange chenille stem
• 2 medium light blue pom-poms
• 2" piece of light blue felt
• 12" light blue scrap fabric, cut to 1" width
• 2 medium white glittery pom-poms
• 2 toothpicks
• 2 jumbo craft sticks
• Blue glitter glue
• Snow texture medium (recommended: Snow-tex)
• Blue chenille stem
• White craft glue or hot glue gun
• Scissors
Directions:
/filters:quality(70)/thumbs/nu/p9/mr7fdgkg5b664dfa6ddc9766910122_506x506.jpg)
If You Gather Your Pinecone from outside, Make Sure There Are No Bugs Hiding inside
/filters:quality(70)/thumbs/iq/z7/rteux93u5b6566c54c8bd328834674_1080x1080.jpg)
Paint Pinecone with White Paint. a Second Coat May Be Needed. Allow to Dry Completely
/filters:quality(70)/thumbs/bk/yw/ws2yz6bx5b64ba6f78f8e544178347_701x701.jpg)
When Pinecone is Dry, Tie Blue Fabric Strip around the Top 1/3 of the Pinecone as the Scarf. Fringe the Ends of the Scarf by Cutting Thin Strips with Scissors
/filters:quality(70)/thumbs/tu/hp/cwugmtn35b64637564527035971584_1080x1080.jpg)
Paint Jumbo Craft Sticks with Light Blue Paint and Set Aside to Dry
Glue Blue Felt Strip to the Top of the Pinecone for the Earmuff Band. Glue the Blue Pom-poms to the Ends of the Felt Strip
Assemble Ski Poles by Gluing White Glitter Pom-poms to the End of the Two Toothpicks
Cut Brown Chenille into Thirds. Set One Piece Aside for Another Project. Insert a Brown Chenille Piece into the Side of the Pinecone for the Arm and Glue in Place. Repeat on Other Side
Hold the "ski Pole" up to the "arm" and Once You Have It Where You Want It, Trim the End of the Chenille to about ¾" Away from the Pole. Wrap the End of the Chenille Arm around the Pole and Add a Dab of Glue to Hold in Place
Glue the Pinecone to the Jumbo Craft Stick Skis. Paint the Craft Sticks with a Bit of Blue Glitter Glue. Dab on Some Snow Texture Medium to the Skis
Dot on Two Eyes with Black Paint Using the Handle End of the Paintbrush. Glue the Orange Chenille Piece in as the Nose
Add a Chenille Hanger for Your Ornament by Bending a Piece of Blue Chenille in Half and Gluing the Open Ends onto the Back of the Pinecone
Cookie Bags
I love to bake extra cookies and share with friends and neighbors during the holiday season! So, allowing my kids to help me decorate bags to deliver the cookies in sounds super fun!
To do this, simply take brown lunch bags, and decorate the front using markers, felt stickers, foam stamps, ribbons, glitter - whatever you like. Then, fold the top over and punch a hold in the center. After filling the bags with cookies and treats, fold the top over where you already folded, and thread ribbon through the hold. Tie a big bow, and you're ready to deliver!
Rolled Felt Snowman
Here is a little snowman that is sure to bring a smile! Even younger kids will enjoy this, and you can make some for your Christmas tree, and some to use as gift toppers for others!
You will need: (per snowman)
• 3 miniature pom poms
• 1 red glitter chenille stem
• 1 sheet white felt
• ½ sheet green felt
• Felt scraps: orange and black
• Scrap of fabric for scarf
• White craft glue
• Scissors
Directions:
Cut a 4” Wide Strip from the White Felt
Cut a 4” X 3” Square from the Green Felt
Cut an 8” X 1” Strip of Fabric for the Scarf
Cut 7 Small Squares from the Black Felt to Use for the Eyes and Mouth
Cut a Long Triangle from the Orange Felt for the Carrot Nose
Roll up the White Felt Strip, Jellyroll Style, and Secure with White Craft Glue
Lay the Green Felt Rectangle on the Table and along the 4” Edge, Fold up about ½” and Glue in Place. This Will Create the Brim for Your Snowman’s Hat
Fringe the opposite Side of the 4” End of the Green Felt but Cutting 1 ½” Long Slits
Roll the Green Felt around One End of the White Rolled Felt. Trim in the Back if Needed and Glue Brim of Hat to the “snowman”
Fold Red Chenille Stem in Half. about 1/3 of the Way up the Folded Chenille, Twist Together to Form a Loop Hanger, Leaving Some Chenille at the Bottom. Twist the Remaining Chenille around the Green Felt Hat Just below the Fringe
Tie the Scrap of Felt around the “neckline” of the Snowman and Add Some Glue to Secure Scarf in Place
Glue Three Miniature Pom Poms below the Scarf as Buttons
Glue Eyes, Nose, and Mouth to Snowman’s Face
Allow Everything to Dry Completely before Hanging
Decorate Gingerbread Men
Kids will have fun designing their very own gingerbread man! Before all the fun begins, go ahead and bake gingerbread men with your favorite recipe. Allow to cool.
Provide the kids with little tubes of icing, mini M&M's, candy sprinkles, gumdrops, and whatever else you can think of and let decorating begin! Let them have fun!
Rudolph the Light Bulb
Save your old light bulbs and recycle them in this cool craft project!
You will need:
• Burnt out light bulb
• White vinegar
• Paintbrush
• Acrylic craft paint: brown, white, black and red
• 1 small jingle bell
• 6" thin gold ribbon
• 3 brown chenille stems
• 1 black chenille stem
• Black thin tip marker
• Red or silver glitter glue
• Hot glue gun
• Scissors
• Sealer spray
Directions:
Rinse the Light Bulb with White Vinegar and Let Dry
Paint Light Bulb Brown and Let Dry Overnight
Paint Light Bulb with a Second Coat and Let Dry for 2-3 Hours
Put a Dot of Hot Glue on the Screw Cap Where It Meets the Glass of the Light Bulb. Place the End of a Brown Chenille Stem on the Glue. Wrap the Chenille Stem around the Screw Cap, Gluing as You Go
Before Continuing with the Second Chenille Stem (it Will Take Two Full Chenille Stems to Cover the Screw Cap of a Standard Light Bulb), Bend the Black Chenille Stem in Half. Glue the Open Ends of the Black Chenille Stem onto the Brown Twists You Just Added (to Create the Ornament Hanger). Now Continue with the Second Brown Chenille, Wrapping around the Ends of the Black Chenille, Covering Them up. Bend the Third Brown Chenille Stem into the Shape of Antlers. Squeeze the Bends so That the Bends Are Touching Each Other. Glue the Antlers to the Back of the Chenille-covered Screw Cap
Dip Thumb in Red Paint and Gently Press onto the Large End of the Bulb for the Nose
Dip Your Pointing Finger into White Paint and Dot on the Eyes. Let the Nose and Eyes Dry before Continuing
Meanwhile, Thread the Jingle Bell onto the Gold Ribbon. when the Bulb is Dry, Turn It over and Glue the Ribbon to the Back of the Bulb, You Want the Jingle Bell to Hang down Just below the Bottom of the Bulb so That It Appears Your Reindeer Has on a Collar
Use the Handle End of a Paintbrush Dipped in Black Paint to Dot on the Blacks of the Eyes
Put a Little Silver Glitter Glue on Your Finger and Smear It over the Top of the Red Nose
When Dry, Spray the Entire Light Bulb with Sealer Spray
I love being creative with my son, and strongly encourage doing things like this with your kids too!
For more information on these crafts and more like them, you can visit kaboose.com
Have you ever done any of these crafts before? Do you like them?
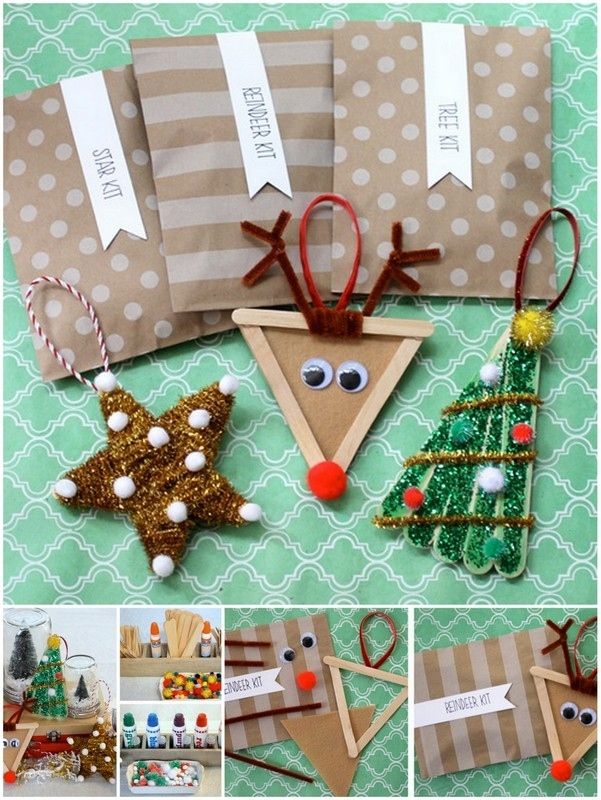
Top Photo Credit: Bella Dia
